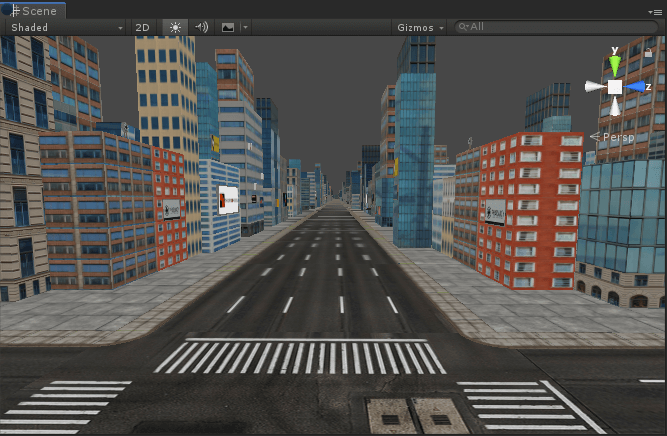
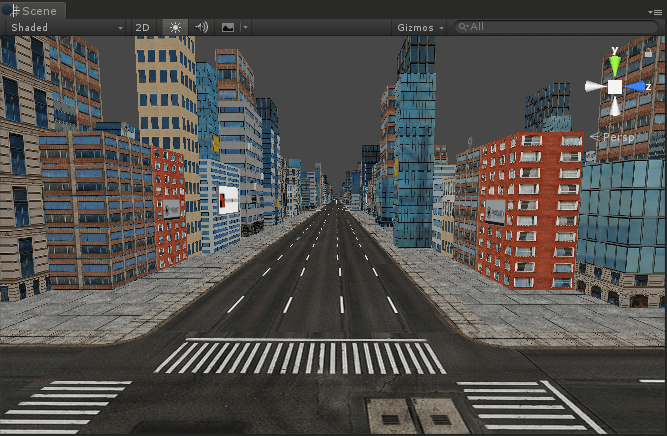
Blurry textures when viewing objects at a distance are caused by mipmaps. However without mipmaps objects may appear visually worse as well as being worse for rendering performance.
This guide explains how to control the blurriness of Unity texture mipmaps without needing to disable mipmaps completely.
Mipmaps & blurry textures
When enabled on texture import settings, mipmaps are smaller versions of textures used when rendering textures far from the camera. This allows textures in the distance to appear smoother and also improve rendering performance giving the GPU smaller textures to render.
Want to learn more about mipmaps and how to use them effectively? Check out the mipmaps section of this guide: https://www.unity3dtips.com/unity-texture-compression-android-ios


Tweaking mipmaps to find an in-between point
Unity has an hidden unexposed value called mipmap bias which allows tweaking of texture import settings to find a good midpoint between being overly blurry and heavily aliased.
However to modify this value you either need to use an editor script or put Unity into developer mode to expose the inspector internal debug mode.
How to enable Unity developer mode
Unity’s developer mode exposes a few extra internal debugging options which add hidden functionality. Although beware that some internal options may cause unforeseen issues and break your project if changed! Always keep a project backup and furthermore avoid changing values without knowing their purpose first!
Internal developer mode is only available in Unity 2018 and later. To activate Unity developer mode simply set the playerprefs key “DeveloperMode” to true.
UnityEditor.EditorPrefs.SetBool("DeveloperMode", true);
Use developer mode to change texture import mipmap bias
With internal developer mode enabled you have access to the internal-debug mode from the inspector. These steps show how you can change the mipmap bias for the texture importer.
- Select the texture(s) you wish to tweak the mipmap settings for.
Select the textures in the project window.
- From the inspector window choose internal-debug from the hamburger menu.
The “hamburger menu” is the 3 lines top right of the inspector window.
- Find & expand the texture settings foldable section.
- Adjust the mip bias value.
A higher value makes the texture blurrier whereas a lower values makes the texture sharper.
Unity recommends not using a value below -0.5 as it reduces rendering performance. This seems strongly based on usage so it’s best to try out different settings on lower-end devices if a value below -0.5 gives better results. - Re-import the texture(s) to have the changes applied.
The textures must be re-imported for the mipmaps to be regenerated with the new mip bias values.

2019.4.1f1 don’t have that mode
It does as long as you enable developer mode by setting the editor bool like the guide says.
Hi, this works for my normal textures but does not seem to affect my rendertextures. Any advice?
Render textures render what your camera sees, so you’ll either need to set the mipmap bias of the texture your camera is rendering such as a road, increase the resolution of your render texture or turn on anti-aliasing for your render texture.
Hey, where am I typing “UnityEditor.EditorPrefs.SetBool(“DeveloperMode”, true);”
Thanks
You make a script and run it atleast once during edit time, for example you can put it in a script function and add [ContextMenu(“Set Editor Mode”)] before the function then right click the script in the inspector and click “Set Editor Mode”
https://docs.unity3d.com/ScriptReference/ContextMenu.html
hi, this is pretty neat, though for some reason it does not work in my build on android, is there a setting somewhere i need to check so i get the same result in the build as in the editor?
It works on android devices fine, make sure on android your quality settings have the same anistropic textures setting as what you’re testing with in the editor.
Is that possible to change the fadeout color? it’s always gray