What is RenderWithShader used for?
Camera.RenderWithShader is a function which allows you to override the rendering of certain objects on a certain camera with a different shader.
The main benefit of using RenderWithShader rather than duplicating objects and using a different rendering layer are that CPU overhead from culling will be lower as the cameras won’t need to calculate culling for objects they’re not rendering. (Which can be a heavy performance hit on mobile platforms or when culling complex high vertex count models)
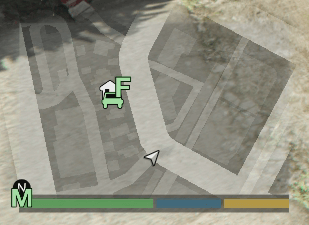
An example where RenderWithShader would be useful could be for making a Grand Theft Auto 5 Styled Minimap.
The roads could be rendered in the minimap camera with a solid colour shader set with a render colour of light grey whilst the main camera renders the road normally.
Camera.RenderWithShader Not Working?
- Make sure objects are actually visible when rendered normally with the replacement shader to ensure the shader isn’t the issue.
- The replacementTag parameter set in the RenderWithShader call must be set as a tag in your replacement shader. (Calling the function as
myCamera.RenderWithShader(replacementShader, "RenderedByReplacementCamera");will mean shader assigned to the replacementShader variable you must have the “RenderedByReplacementCamera” tag)
Tags {
    "Queue" = "Geometry"
    "RenderType" = "Opaque"
    "RenderedByReplacementCamera" = "True"
}
- Setting the replacementTag as an empty string will not allow no replacementTag, it’ll literally be checking for a blank tag instead so beware of this. (Use null instead if you don’t want to require a replacementTag to be set in the shader)
RenderWithShader Example Script
You’ll need a reference to the camera you want to render with the replacement shader as well as the replacement shader you want to render with.
When rendering with a replacement shader the default camera rendering needs to be disabled so simply disable the Camera component on Awake (or when you want to switch to using the replacement shader if you want to toggle the rendering on and off in cases such as night vision rendering)
Then when you want to render the camera with the shader call the RenderWithShader function, calling it within a Update() function is probably the best option but you can manually control when the rendering happens if you don’t need to render it every frame. (Such as a radar blip which might update every few seconds)
public Camera minimapCamera;
public Shader minimapShader;

void Awake() {
    minimapCamera.enabled = false;
}
void Update() {
    minimapCamera.RenderWithShader(minimapShader, "RenderedByMinimap");
}
In your shader you then need to set the replacement tag, otherwise nothing will be rendered. ("RenderedByMinimap" = "True" in this example)
Shader "Example/Minimap"
{
  Properties
  {
    _MainTex ("Base (RGB)", 2D) = "white" {}
    _Color("Minimap Color", Color) = (1.0, 1.0, 1.0, 1.0)
  }

  SubShader
  {
    Tags
    {
      "Queue" = "Geometry"
      "RenderType" = "Opaque"
      "RenderedByMinimap" = "True"
      "IgnoreProjector" = "True"
      "ForceNoShadowCasting" = "True"
    }

    Lighting Off
    Blend Off
    Cull Back
    ZWrite On

    CGPROGRAM
    #pragma surface SurfaceMain Lambert noforwardadd

    sampler2D _MainTex;
    fixed4 _Color;

    struct Input
    {
      fixed2 uv_MainTex;
    };

    void SurfaceMain(Input input, inout SurfaceOutput output)
    {
      fixed3 finalColor = _Color;

      output.Albedo = lerp(finalColor, tex2D(_MainTex, input.uv_MainTex), (fixed)0.3);
      output.Alpha = (fixed)1;
    }
    ENDCG
  }

  FallBack "Mobile/VertexLit"
}
For more information on this topic you can check out the Unity shader replacement documentation which explains shader replacement in more details with other alternatives if RenderWithShader was not what you needed!


